
A sunny strip beside a paved path can dry out while a shaded bed a few metres away stays damp. Give both the same plants and watering schedule, and you may waste water while leaving roots in the wetter bed short of air. Start a lower-water garden by mapping those differences before choosing plants or irrigation equipment.
Map where water goes
Walk the garden after rain, then again during a dry spell. Mark sun and shade, slopes, exposed corners, roof downspouts, compacted ground and spots where puddles linger. Note whether runoff leaves the property or collects near a building, retaining wall or path. A sketch of these conditions is more useful than a planting plan based only on how the space looks in spring.
Check soil in several places; it may not be uniform. Take a small sample from below the surface. Sandy soil feels gritty and often drains quickly. Clay-rich soil feels sticky when wet and may drain slowly, especially where it is compacted. Topsoil, imported fill and ground disturbed during construction can behave differently within the same yard. You can fill a shallow test hole with water and watch how long it takes to drain, but use that result as a site clue, not a formal infiltration measurement.
Do not redirect runoff toward foundations, neighbouring property or unstable slopes. If you find persistent ponding, erosion, buried utilities or drainage structures, identify those constraints before changing grades or concentrating roof water in a planting bed.

Set a realistic water budget
Decide which areas need supplemental water. A vegetable bed, a newly planted tree and an established drought-tolerant border have different needs; giving each a little water is less useful than prioritising them. During a dry summer, you might maintain food crops and young plants while allowing an established lawn to go dormant, if the grass species and local conditions permit.
Rainfall totals alone do not show how much water reaches roots. A short storm may produce runoff, while slower rain can soak in. Heat, wind, humidity and soil depth affect how quickly the root zone dries afterward. If water restrictions apply, check current local rules before setting an irrigation schedule or collecting rainwater; requirements vary by location.
If you have a water meter, record use during a week without outdoor watering and compare it with a typical irrigation week. Household use varies, so the difference is only an estimate, but it provides a baseline. A rain gauge or straight-sided container can also show how much water a sprinkler applies to a zone. That is more useful than judging an irrigation session by how long the hose ran.
Choose plants for the conditions they will live in
“Drought tolerant” does not mean suitable for every dry-looking site. The label usually describes an established plant growing in appropriate soil, light and climate. A species adapted to free-draining ground may struggle in compacted clay that stays wet in winter, even if summers are dry. Check mature size, winter hardiness, soil preference and invasive status against reliable local horticultural guidance.
Group plants with similar water needs into hydrozones. Put thirstier species where you can deliver and monitor water easily, rather than scattering them among plants that need little irrigation. Plants requiring consistently moist soil should not share an irrigation zone with those adapted to drying between waterings. Grouping also lets you shut off water to an established bed without depriving nearby new plants.
Use the site’s advantages
- Sunny, exposed ground: Consider locally suitable plants that tolerate heat and drying once established. Check the soil volume available for roots, especially beside paving.
- Dry shade: Choose species adapted to both shade and root competition. Soil beneath mature trees may be dry despite the shade.
- Low, damp areas: Select plants suited to periodic wetness only after checking why water collects there. Planting should not conceal a drainage problem affecting a structure.
- Containers: Expect faster drying than in open ground, particularly in small or dark pots in full sun. Group containers by water need and provide accessible drainage.
Cut back high-water planting where it brings little benefit. A lawn used regularly for play or access may justify irrigation; a narrow strip that is difficult to water might work better as a planted bed or permeable surface, subject to site drainage requirements. Replace lawn in manageable sections so bare soil is not left open to erosion or weeds.
Improve the soil without creating a new drainage problem
Organic matter helps some sandy soils hold moisture and can improve the structure of some heavier soils over time. Add suitable compost according to the soil condition and the plants chosen, rather than assuming more is better. A small pocket of rich material in otherwise poorly draining ground can leave roots sitting in a wet basin. If fill, contamination or severe compaction is a concern, seek appropriate local advice before growing food or making major soil changes.
Avoid working clay-rich soil when it is saturated: footprints and equipment can compact it further. Keep construction traffic and repeated foot traffic off planting beds. Where practical, cover the soil with plants or mulch. Check soil depth as well as texture in new beds; a thin layer of good topsoil over dense subsoil can restrict root growth and water storage.
Mulch reduces evaporation from exposed soil and moderates surface temperature, but new plants may still need watering. Apply an appropriate layer of organic mulch while leaving a gap around stems and tree trunks. Mulch piled against bark holds moisture where it can contribute to decay. Check the layer as it settles instead of adding more each season without looking: crowns can become buried and the soil surface can change.
Design irrigation around roots, not the calendar
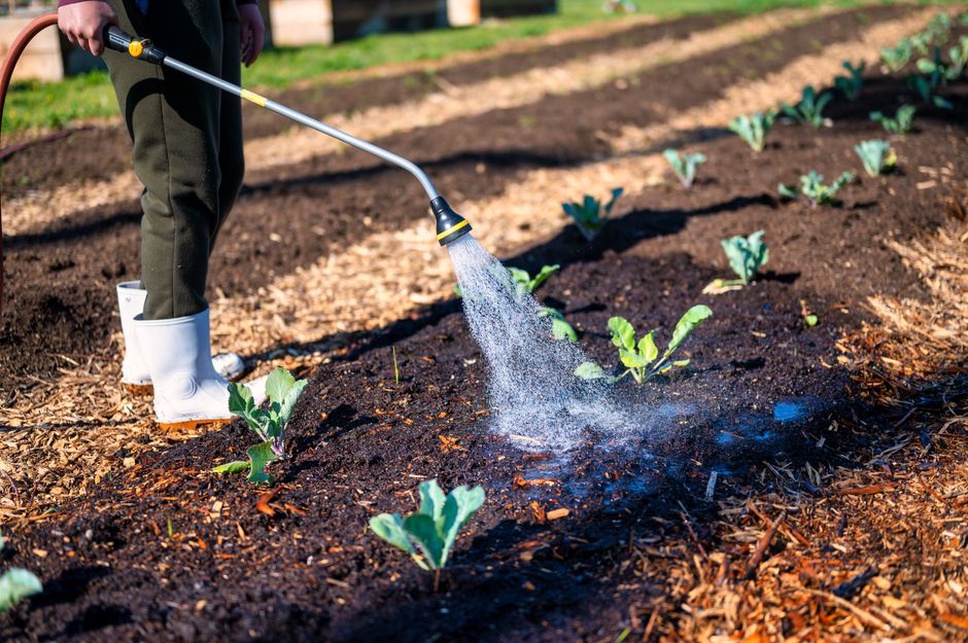
New plants generally need closer attention while their roots extend into surrounding soil. Once established, the same species may need little or no supplemental water in an ordinary season. Allow for that change so a permanent system does not give mature, low-water plants the same frequent watering as new arrivals.
Drip lines and soaker hoses can deliver water near plants without wetting paths and foliage, but layout and maintenance still matter. An emitter beside a stem may wet only a small patch. A clogged outlet can leave a plant dry without an obvious spray failure, and delivery along a line may vary on a slope. Run each zone, then inspect soil below the surface at several points.
Sprinklers may suit lawns or broad areas of groundcover. Check for overspray onto paving and uneven coverage. Watering early in the day often loses less to wind and evaporation than watering in the heat of the afternoon. A timer setting is no proof that water reached the root zone. Weather-based controllers and rain shutoff devices can help, provided their zones and sensors are set up and checked.
Check moisture before adding water
Push a trowel into the soil near the roots and look below the dry surface. If the soil beneath is still moist, another watering may not be needed. If it is dry through the active root area, apply water slowly enough to soak in rather than run off. The depth to check depends on the plant and its stage of growth, so look beyond the top centimetre. Wilt can also signal heat, waterlogged roots or disease; check the soil before reaching for the hose.
For a new irrigation zone, set out several small containers and compare the water collected during a test run. Large differences suggest a coverage or pressure issue. Repeat the check after changing emitters, moving sprinklers or adding plants. If runoff starts before the soil is adequately wet, pause to let water infiltrate before continuing, provided the area drains safely.
Handle rainfall and stored water carefully
Keeping rainfall on planted ground can reduce irrigation demand, but the safe approach depends on the property. Healthy soil, vegetation and well-placed mulch can slow surface flow. A rain garden or similar feature needs closer assessment of soil infiltration, its overflow route, distance from buildings and buried services. On constrained sites, particularly near foundations or slopes, seek site-specific advice before excavating or directing downspouts into the ground.
Where local rules allow, rain barrels can supply water for nearby plants. Use a covered container with a screened inlet and a controlled overflow that directs water away from vulnerable structures. Stored rainwater is not automatically safe to drink or to use in ways that could contaminate edible produce; roof materials, debris and local conditions affect its quality. Empty or protect the system as needed in freezing weather.
Plan for the first two growing seasons
Plant at a locally suitable time so roots have a chance to develop before peak heat. Space plants for their mature size instead of filling every gap at once. Crowded roots compete for limited moisture, and dense foliage can hide irrigation faults. Keep labels or a simple plan noting species, planting dates and irrigation zones so you can track changes.
Inspect new plants regularly during their first dry periods. Check that water reaches the surrounding soil, not just the original root ball, and adjust the interval as roots spread. Remove weeds while they are small; they compete for water. If an established plant repeatedly needs rescue watering, reassess its location and soil before increasing irrigation across the whole bed.
After a dry spell, note which zones stayed healthy without watering and which dried first. Move an emitter, renew a thin patch of mulch or replace a poorly matched plant before expanding the system. After the next irrigation, a trowel check in the driest-looking spot will tell you whether the adjustment put water where roots can use it.