
Trapping one shoe’s heel under the other foot may save a few seconds, but it can crush the heel counter—the stiff part that helps the back keep its shape. Loosen the fastening and lift the shoe off instead. Shoes tend to fail at specific points: worn tread, strained seams, damaged linings or uppers that lose their shape. Noticing where the stress falls makes it easier to prevent avoidable damage.
Start with fit and fastening
A shoe that slips at the heel rubs its lining with every step. One that is too tight puts sustained pressure on the upper, seams and foot. A tougher material will not reliably fix either problem. Check fit with the socks you plan to wear: your toes should be able to move, and your heel should feel secure without being squeezed.
Fasten shoes before walking, and readjust them if your comfort changes rather than treating them as slip-ons. On lace-up work footwear, laces spread tension across the upper; a loose shoe allows more movement inside. Do not pull them as tight as possible, though. Excess tension can press on the foot and strain eyelets or stitching. If laces keep coming undone, check their condition and how they are tied before changing the shoe’s fit.
For a snug shoe, loosen the opening enough that the heel counter does not fold inward as you put it on. A shoehorn can help with a structured heel, but it should not be used to force on a shoe that is too small. Undo laces, straps or zippers before taking shoes off, too. Repeatedly dragging a foot through a narrow opening stretches the collar and wears the lining.
Give moisture a way out
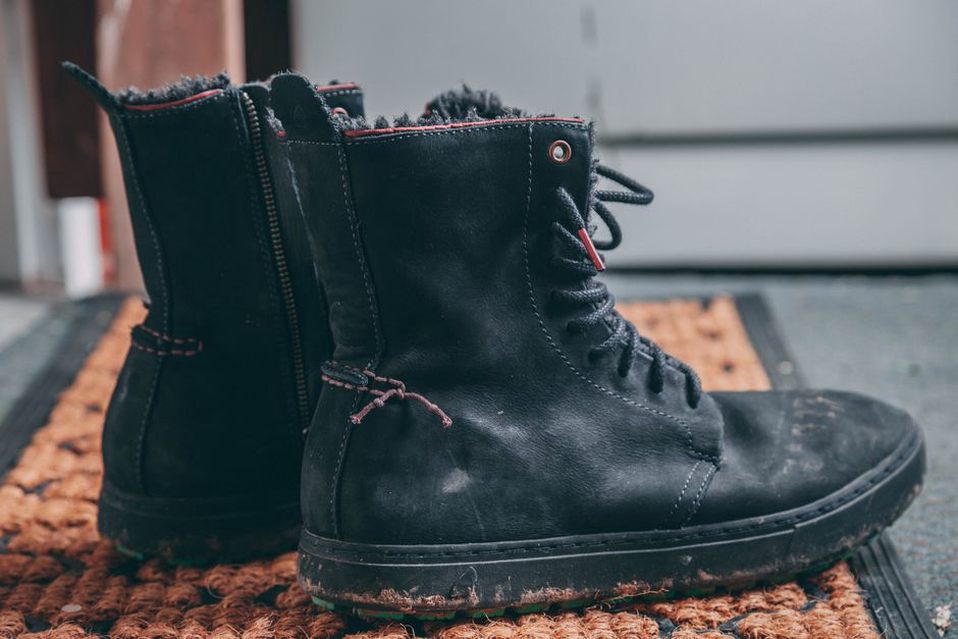
Shoes get damp without ever seeing rain. Perspiration wets the lining during ordinary use, while wet ground can soak the outside and seams. Left damp between wears, footwear may develop odor, and some materials may deteriorate faster. Dry it promptly, but avoid high heat: it can distort components, affect adhesives and leave leather stiff or cracked.
After a wet day, remove loose insoles if the manufacturer’s instructions permit it, open the shoes wide and let air circulate at room temperature. Take out damp socks and removable liners. If the shoes are muddy, clear off the bulk before it hardens against the upper. Blot surface water with a dry, absorbent cloth. Paper placed loosely inside may absorb interior moisture; replace it when wet, and do not pack it tightly enough to distort the shoe.
A fan moving room-temperature air may help. Keep shoes away from radiators, heaters and other direct high heat unless the care instructions specifically allow it. A waterproof upper can trap perspiration, so check the lining even if the outside feels dry. If the pair is still wet in the morning, wear a dry pair instead.
Rotate pairs when their use justifies it
Alternating between two suitable pairs gives each more time to dry and a chance to spot damage before the next wear. It does not prevent tread abrasion; distance walked still wears soles. Rotation helps most when footwear routinely gets damp during long shifts, wet weather or heavy perspiration. If a second pair is impractical, focus on drying the pair you have, and do not seal it in a bag straight after use.
Match footwear to the conditions as well. A light indoor shoe will wear quickly on abrasive gravel, while a wet outdoor boot may be unnecessarily uncomfortable indoors. Choose shoes suited to the surface and any required protective features, rather than preserving one pair by wearing an unsuitable substitute.
Clean according to the material, not a fixed schedule
Grit abrades stitching, flex points and the joint between upper and sole. Salt and other residues can mark or affect materials if left in place. A brief check after a dirty or wet day often saves more work than an occasional intensive clean.
Brush off loose dirt with a soft brush or wipe it away with a cloth. Carefully remove stones caught in the tread without cutting the rubber. For a deeper clean, follow the maker’s care guidance, test any cleaner on a small, inconspicuous area and avoid soaking footwear unnecessarily. The right approach depends on the material:
- Smooth leather: Wipe off dirt with a slightly damp cloth and let the leather dry naturally. If it feels dry, use a care product compatible with the finish; too much can leave buildup.
- Suede and nubuck: Let surface mud dry, then gently remove it with an appropriate brush. Water and oily products can change the finish’s appearance, so test any treatment first.
- Textile or mesh uppers: Clean gently. Hard scrubbing can fuzz fibers or damage mesh. Rinse away cleaner residue if the care instructions allow it, then dry thoroughly.
- Rubber and synthetic components: Wipe away mud and residue, especially in flex grooves and along the edge where sole meets upper. Check compatibility before using solvents or strong cleaners.
Machine washing is not a universal shortcut. Agitation, prolonged immersion and drying heat can harm adhesives, shape or finishes. Use a machine only if the manufacturer explicitly permits it, and follow its washing and drying instructions. Protective sprays and conditioners are material-specific, too. They may help with particular exposure, but they cannot replace cleaning, drying or a sound sole.
Inspect the parts that fail first
A quick check while your shoes are in your hands can catch damage early, particularly after heavy rain, muddy work or an unexpected change in comfort. Sometimes the fix is a new lace. A loose sole or failed protective component needs a more serious decision.
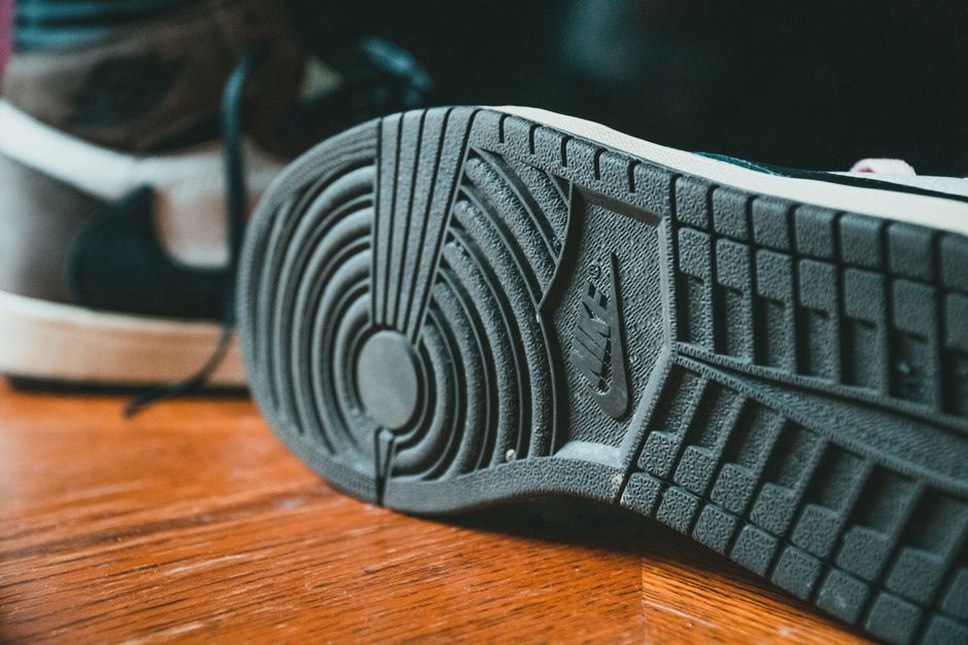
- Turn the shoe over. Look for smooth tread, uneven wear, embedded debris and cuts. Compare both shoes rather than judging one alone.
- Check the upper-to-sole edge. Look for gaps that open as the shoe flexes and for separated stitching. A visible line is not necessarily structural damage; check whether the parts move apart.
- Feel the inside. A folded lining, exposed seam or worn-through heel area can rub even when the exterior looks sound.
- Check fastening and shape. Frayed laces, damaged eyelets, a collapsing heel or a bent insole can change how the shoe sits on the foot.
Pay particular attention to tread where slipping is a risk. A sole can look intact from the side while its contact surface has worn smooth. The tread needed depends on the surface and the footwear’s intended use; appearance alone cannot establish slip resistance. For safety footwear, follow workplace requirements and the manufacturer’s guidance when deciding whether it remains suitable. Do not keep wearing a compromised protective boot just because the upper looks presentable.
Repair small defects before they spread
Replace frayed laces before they break during a shift. Depending on the shoe’s construction and condition, a repair professional may be able to replace heels, resole it, restitch a seam or repair a lining. Not every shoe can be resoled, and changing the sole may affect the expected performance of specialized footwear. Ask about the specific pair rather than assuming a detached part can be glued back permanently.
Home adhesive may temporarily close a minor separation, but it cannot be relied on to restore a safety-critical sole, waterproof seam or damaged protective feature. If a gap grows, the shoe twists unusually or the sole catches on the ground, do not treat it as cosmetic damage. Replacement may be safer than another repair.
Store shoes without trapping damage
Dry shoes before storing them. A closed plastic container or gym bag restricts airflow around a damp pair, leaving moisture and odor in the lining. Once dry, keep shoes in a reasonably ventilated place away from sustained heat and direct sunlight. Sunlight can fade finishes; heat may affect shape and adhesives. Do not stack heavy objects on structured uppers.
Shoe trees can help some leather shoes hold their shape and manage minor moisture between wears. Choose ones that fit without stretching the upper. For tall boots, loose support inside the shaft can limit creasing during longer storage. Neither helps if the footwear is put away wet. Before storing a seasonal pair, clean and dry it fully, then check it periodically for trapped moisture or changes in the material.
Keep removable insoles flat or properly seated. A curled edge can create pressure points and wear the lining beneath it. If an insole is worn out, replace it with one that fits without crowding the foot. Insoles may improve comfort, but they cannot restore tread or fix a failed shoe structure.
Match expectations to the job the shoe does
Service life depends heavily on use. Abrasive surfaces wear outsoles; frequent wetting challenges seams and linings; kneeling abrades toe areas; and long periods on foot compress cushioning. A shoe worn mainly indoors is not directly comparable with one used daily on rough, wet ground.
Notice where the wear develops. Symmetrical tread loss at high-contact areas may be ordinary use. Rapidly uneven wear, sudden discomfort or a new lean in one shoe may point to a fit, gait or footwear problem. Seek advice from an appropriate health professional if foot pain persists. A recurring pattern is worth investigating rather than assuming every worn sole reflects poor cleaning.
Care must also respect the shoe’s purpose. A protective work boot may have performance requirements that casual footwear does not. Alterations, incompatible replacement parts and improvised repairs can undermine those requirements. If footwear is issued for a workplace hazard, use the employer’s inspection and replacement process rather than judging it by appearance alone.
Keep a soft brush and dry cloth where you take off your shoes. After a muddy shift, clear the outsole grooves and wipe the upper before leaving the pair to air out. Grit is easier to remove then than after it has hardened against a seam overnight.